Ever found yourself gripping a rope so tight your knuckles turned white—heart pounding—not because of the view, but because you weren’t 100% sure your belay device was handling the rappel right? You’re not alone. In fact, AMGA incident reports show that nearly 22% of technical rope-related accidents involve improper rappel setup or device misuse.
If you’ve ever second-guessed whether your Grigri, ATC, or figure-eight was up to the task on the way down, this guide is for you. We’ll unpack exactly how to safely and effectively use common belay devices for rappelling—covering gear selection, technique nuances, real-world fails (yes, I’ve made them too), and the one “terrible tip” you must avoid at all costs.
You’ll learn how to choose the right device, set it up without panic, troubleshoot mid-rappel issues, and understand why certain devices shine in specific scenarios. No fluff. Just climber-to-climber truth, forged on granite and limestone alike.
Table of Contents
- Why Rappelling with a Belay Device Matters
- Step-by-Step: How to Rappel Safely Using a Belay Device
- Pro Tips for Smooth, Controlled Rappels
- Real-World Case Study: When Gear Choice Saved the Day
- Rappelling with Belay Device: FAQs
Key Takeaways
- Not all belay devices are equally suited for rappelling—tube-style (e.g., Black Diamond ATC) offer versatility; assisted-braking devices (e.g., Petzl GriGri) require specific techniques.
- Always double-check rope threading, backup knots (like a prusik or autoblock), and anchor integrity before committing to a rappel.
- Rappelling with a standard tube device gives more control over rope speed and is generally preferred for multi-pitch descents.
- Misusing an assisted-braking device during rappel—especially without understanding its internal mechanism—can lead to catastrophic failure.
- Experience trumps assumptions: practice rappelling in controlled environments before committing on exposed terrain.
Why Rappelling with a Belay Device Matters
Rappelling isn’t just “lowering yourself down.” It’s often the most vulnerable part of a climb—the moment when there’s no partner catching you, no second chance if something slips. And while dedicated rappel devices exist (like the Pirana or Abseil 8), many climbers rely on their everyday belay device to pull double duty. Why? Pack weight, simplicity, and familiarity.
But here’s the rub: using a belay device for rappelling isn’t always plug-and-play. I learned this the hard way on a desert tower in Utah. I’d brought my Petzl GriGri because it’s amazing for sport climbing—but forgot that rappelling with it requires threading the rope through a specific path to engage the cam properly. Halfway down, the rope jammed. Not catastrophically, but enough to send my pulse through the roof while dangling over a 200-foot drop. Lesson burned into my brain: know your gear inside out.
According to the Mountain Project Safety Database, improper rappel setups are among the top three causes of non-fall-related climbing incidents. That’s not fearmongering—it’s a call to get deliberate about your descent protocol.
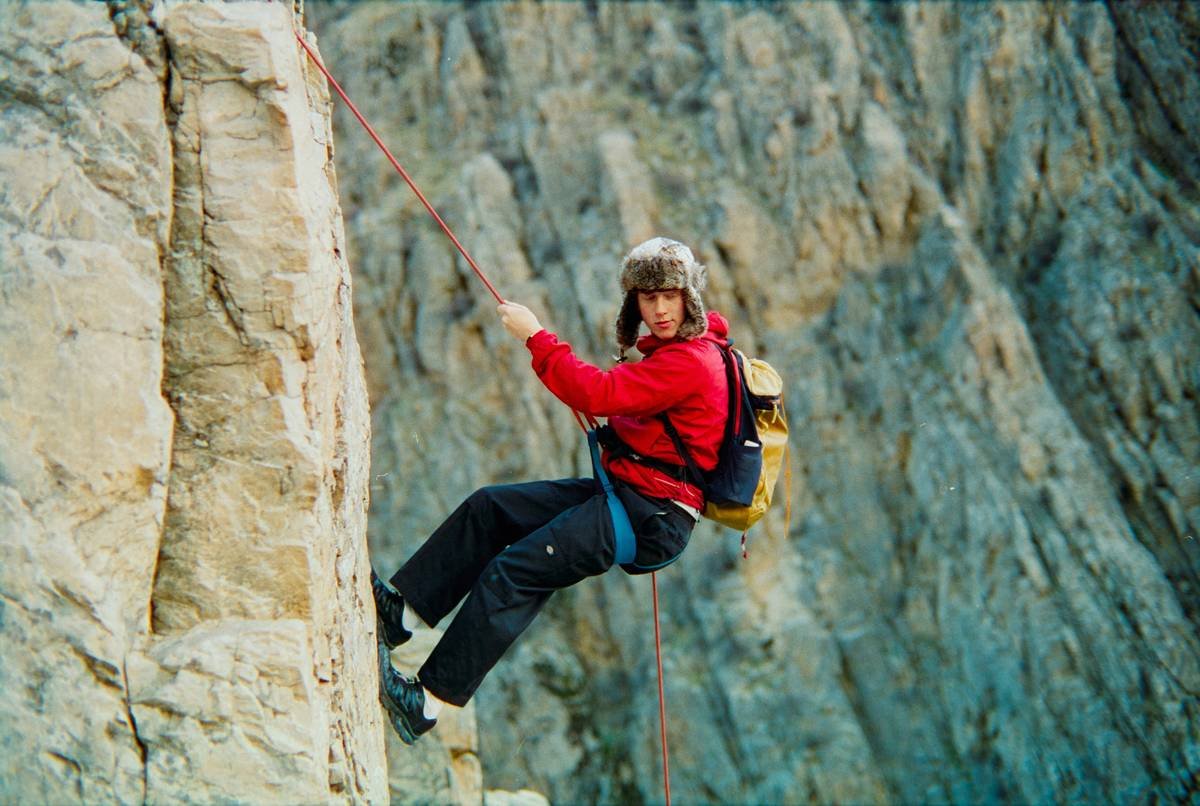
Step-by-Step: How to Rappel Safely Using a Belay Device
Can you really rappel with any belay device?
Technically, yes—but responsibly? Only if it’s designed or adaptable for it. Tube-style devices (ATC, Reverso, DMM Pivot) are rappel-ready out of the box. Assisted-braking devices like the GriGri or Edelrid Eddy can be used, but with caveats (more on that below).
Optimist You:
“Just follow these five steps, and you’ll descend like a pro!”
Grumpy You:
“Ugh, fine—but only if coffee’s involved… and maybe a backup knot.”
Step 1: Choose the Right Device for the Job
- Tube-style (e.g., BD ATC Guide): Best for multi-pitch rappels. Offers smooth control, works with single or double ropes, and allows easy addition of a friction hitch backup.
- Assisted-braking (e.g., Petzl GriGri 2/3): Can be used, but requires precise rope threading. Only compatible with single ropes within specified diameter range (check manufacturer specs!).
- Avoid: Figure-8s for regular rappelling—they spin, tangle ropes, and offer less control than modern devices.
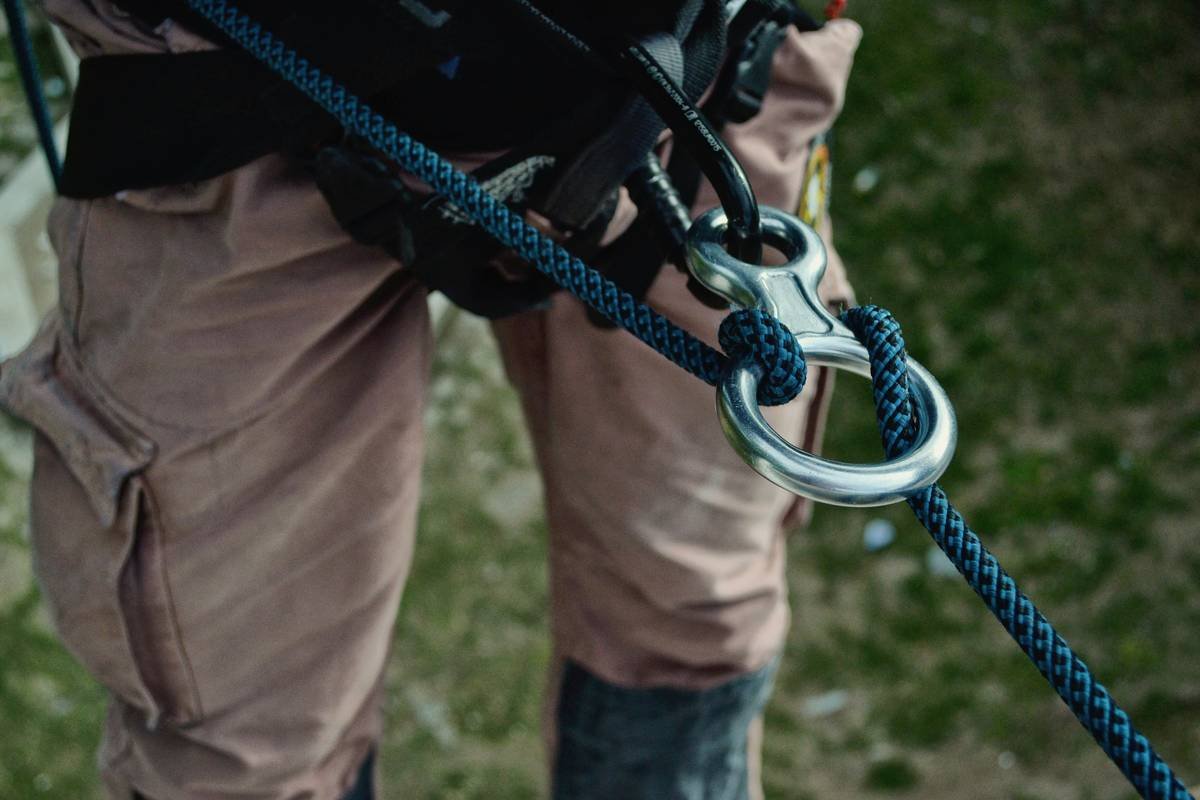
Step 2: Anchor & Rope Setup
– Verify anchor strength (two opposed locking carabiners minimum).
– Pull the midpoint of the rope through the anchor.
– If using double ropes, ensure equal length on both strands.
– Tie stopper knots (double overhand) at both rope ends—non-negotiable.
Step 3: Thread the Device Correctly
For an ATC: Feed both strands through the device, then clip with a locking carabiner (pear-shaped HMS recommended).
For a GriGri: Rope goes only through the designated rappel slot—never backward. The cam must engage freely.
Step 4: Add a Backup (Seriously)
Attach an autoblock (prusik or klemheist) below your device connected to your leg loop. It won’t save you from a total lapse, but it will catch slips due to hand fatigue or distraction.
Step 5: Test Before Committing
Weight the system gradually. Wiggle. Check for snags. Do a mini-rappel while standing on the ledge. Then—and only then—lean back and descend.
Pro Tips for Smooth, Controlled Rappels
- Use gloves. Rope burn on rappel isn’t just painful—it can make you jerk the rope, causing loss of control.
- Extend your device. Clip it to your harness with a 60cm sling (cow’s tail style). This keeps the device away from your body, reducing tangles and improving brake-hand position.
- Communicate clearly at the top. Use standardized calls: “Rope free!” only after confirming both ends reach the ground or next station.
- Practice in the gym first. Many gyms allow rappel practice on fixed lines—use it to build muscle memory.
- Never rappel alone without redundancy. Solo? Double-check everything twice. Better yet, carry a second device or mechanical descender as backup.
⚠️ Terrible Tip Disclaimer:
“Just wing it—you’ve seen YouTube videos!” Nope. Watching ≠ doing. Rappelling demands tactile experience. Don’t treat your first real rappel like a tutorial experiment.
Rant Section: My Pet Peeve?
Climbers who say, “I don’t need a backup—I’ve got good hands.” Cool story. Tell it to the rescue team after you black out from dehydration at 8,000 feet and let go. Control isn’t just skill—it’s systems. Respect the rope.
Real-World Case Study: When Gear Choice Saved the Day
Last summer in the Dolomites, my partner and I topped out on Via Ferrata della Marmolada—then realized our descent required four 50m rappels. We only had our BD ATC Guides and 60m twin ropes.
We extended each device with a dyneema sling, added autoblocks from cordelette, and rappelled in sync. On the third pitch, icy conditions made the rope stiff and slippery. The ATC’s dual-slot design let us increase friction by pulling the rope across the side horn—something a GriGri couldn’t do mid-rappel. We descended safely, calmly, and without drama.
Had we tried to force a GriGri in that scenario? Ice + cam mechanism = potential freeze. Tube devices win for adaptability in alpine environments. This isn’t theory—it’s lived experience.
Rappelling with Belay Device: FAQs
Can I rappel with a GriGri?
Yes—but only with a single rope within the manufacturer’s diameter range (usually 8.5–11mm). Thread the rope through the rappel-specific slot (not the belay path). Petzl explicitly approves this in their technical notice.
Is an ATC better than a GriGri for rappelling?
For most traditional or alpine descents, yes. ATCs handle double ropes, offer variable friction, and are less prone to freezing or jamming in dirty/wet conditions.
Do I need a special carabiner?
Use a large, pear-shaped (HMS) locking carabiner. Its wide gate accommodates rope bends and device movement without binding.
What if my rope gets stuck mid-rappel?
Don’t panic. If you have a partner above, they may be able to free it. Solo? Carry a knife (last resort) or a second rope for re-ascending—both advanced skills requiring prior training.
How often should I inspect my belay device?
Before every climb. Look for cracks, excessive wear, or deformation—especially around rope grooves. Most manufacturers recommend replacing after 5+ years of regular use, even if it “looks fine.”
Conclusion
Rappelling with a belay device is standard practice—but standard doesn’t mean simple. Mastery comes from understanding your gear’s limits, respecting the physics of friction, and never assuming “it’ll be fine.” Whether you’re using an ATC on El Cap’s descent gullies or cautiously rappelling off a sea cliff in Cornwall, the principles remain: verify, backup, and practice.
Your belay device isn’t just hardware—it’s your dialogue with gravity on the way down. Make it a conversation you’re prepared for.
Like a Tamagotchi, your rappel safety needs daily care—feed it attention, not complacency.
Haiku:
Rope sings through metal,
Brake hand firm, heart steady now—
Earth rises to meet me.