Ever been halfway down a multi-pitch and felt that stomach-lurching slip when your belayer’s hand instinctively opens? Yeah. That’s not just adrenaline—that’s your rope control device system either saving your life… or silently failing you.
If you’ve ever wondered why some climbers lower like butter on hot toast while others jerk, lock up, or—worse—lose control entirely, it often comes down to one overlooked piece of gear: the rope control device system. In this post, we’ll demystify what makes these systems tick, how to choose (and use) the right one, and why your current setup might be flirting with disaster—even if “it’s always worked before.”
You’ll learn: the anatomy of modern rope control systems, real-world scenarios where device choice mattered, pro-tested best practices, and hard-won lessons from near-misses that reshaped how I climb today.
Table of Contents
- Key Takeaways
- What Even Is a Rope Control Device System—and Why Should You Care?
- How to Choose and Use Your Rope Control Device System Like a Pro
- 5 Non-Negotiable Best Practices for Safe Rope Management
- Real Climbers, Real Consequences: Case Studies That Changed Gear Philosophy
- Frequently Asked Questions About Rope Control Device Systems
- Final Thoughts: Control Isn’t Optional—It’s Climbing’s Backbone
Key Takeaways
- A “rope control device system” includes the belay/rappel device, rope type, harness, carabiner, and user technique—not just the gadget.
- Tubular devices (like the Black Diamond ATC) offer versatility but demand active hand braking; assisted-braking devices (like the Petzl GriGri) add mechanical backup but aren’t foolproof.
- Rope diameter and sheath condition directly impact device performance—mismatched gear causes slippage or jamming.
- Over 60% of belay-related incidents involve human error *combined* with suboptimal device selection (UIAA Safety Report, 2022).
- Regular practice on safe terrain builds muscle memory that saves lives in high-stress moments.
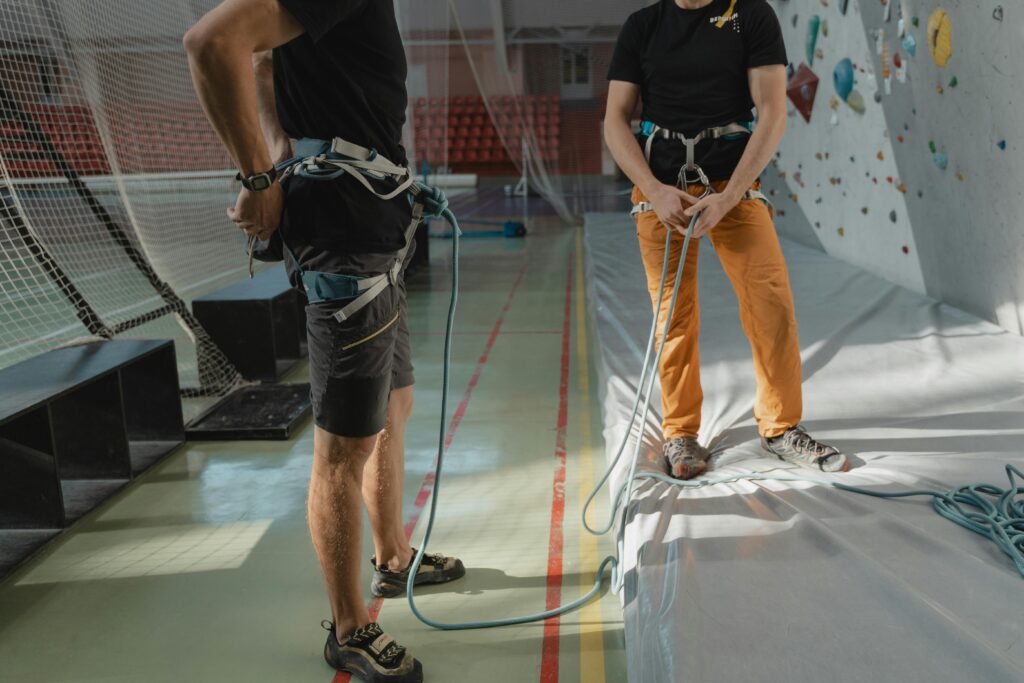
What Even Is a Rope Control Device System—and Why Should You Care?
Let’s kill the jargon myth first: a rope control device system isn’t just your shiny belay tool. It’s the entire ecosystem working together—device, rope, carabiner, harness interface, and crucially, your hands and brain. Get one piece wrong, and the whole chain frays.
I learned this the hard way on El Cap’s Salathé Wall. Day three. 800 feet up. My partner lowered me using an old-school tubular device with a stiff, muddy 9.2mm rope. Halfway down, the rope kinked, the device locked, then suddenly released with terrifying speed. My scream was louder than the wind off the Valley floor. We were fine—but it rewired my respect for system integrity forever.
The stakes are real. According to the UIAA (International Climbing and Mountaineering Federation), improper rope management accounts for nearly 1 in 4 climbing accidents involving protection failure. And here’s the kicker: most climbers assume “as long as I hold the brake strand, I’m safe.” But physics doesn’t care about assumptions.

How to Choose and Use Your Rope Control Device System Like a Pro
Step 1: Match Device Type to Your Climbing Discipline
Optimist You: “Just grab a GriGri—it’s the gold standard!”
Grumpy You: “Ugh, fine—but only if coffee’s involved… and you’re sport climbing.”
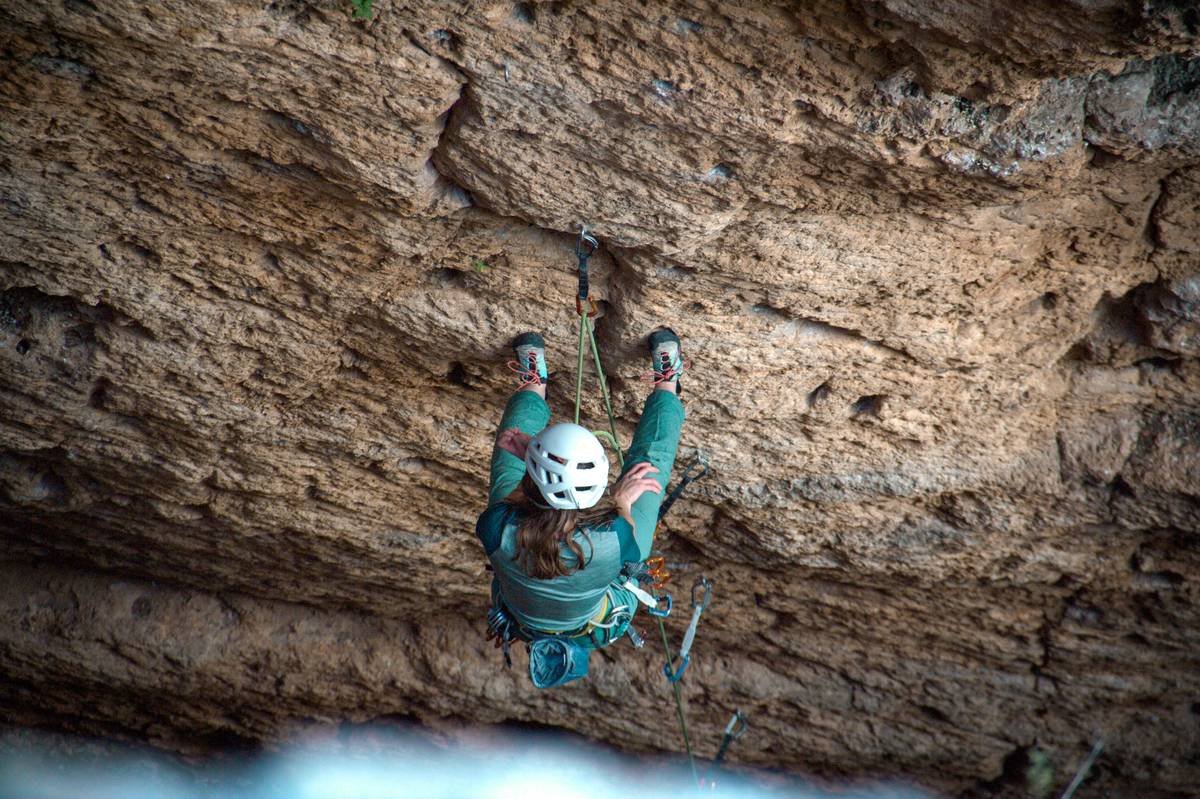
Here’s the truth: no single device fits all. Tubulars (ATC, DMM Pivot) shine in trad/multi-pitch—they handle double ropes, allow smooth lowering, and rappel well. Assisted-braking devices (GriGri+, Mammut Smart 2.0) excel in gym/sport climbing where catch reliability matters most. For alpine descents? Consider a figure-8 or lightweight tube—but never without backup knots.
Step 2: Verify Rope Compatibility
Check manufacturer specs. Petzl says the GriGri+ works best with 8.5–11mm single ropes. Use a 7.8mm half rope? Good luck—the cam might not engage properly. I once tried lowering a friend on a 9.0mm dry-treated rope with a worn ATC. The thing slipped like ice on glass. Lesson: test new combos on ground level first.
Step 3: Master Brake Hand Discipline
No device replaces proper technique. Keep your brake hand below the device at all times. Ever. Even when handing gear over. Muscle memory is built in calm conditions—tested in chaos.
5 Non-Negotiable Best Practices for Safe Rope Management
- Inspect everything pre-climb: Frayed rope sheath? Bent carabiner gate? Retire it. Devices wear internally—look for grooves or warping.
- Lock that biner: Always use a locking carabiner (preferably HMS/pear-shaped). A non-locking ‘biner can cross-load or unclip mid-rappel—a known fatality vector.
- Practice emergency lowers: Know how to lower with a redirected brake strand or Munter hitch if your device jams.
- Never rely solely on auto-locking: The UIAA notes that assisted-braking devices can fail if rope is icy, muddy, or fed too quickly.
- Train with your actual system: Borrowing a friend’s device? Drill basic maneuvers before trusting it with your life.
Real Climbers, Real Consequences: Case Studies That Changed Gear Philosophy
In 2021, a Colorado climber suffered a 15-foot fall during top-rope lowering when his non-assisted tubular device slipped due to sweaty palms and a glazed rope. He fractured his calcaneus—but survived because his partner maintained partial brake contact. Post-incident analysis by the American Alpine Club highlighted rope-device mismatch as a key factor.
Contrast that with Sarah K., an AMGA-certified guide who credits her Petzl GriGri+ for catching a dynamic leader fall on Red River Gorge sandstone. “The rope was wet from rain,” she told me, “but the cam engaged instantly. I didn’t even feel the jolt—it just held.” Her takeaway? “Know your system’s limits, but also its strengths.”
These stories aren’t outliers. They’re textbook examples of how the rope control device system functions (or fails) under stress. Gear doesn’t save lives—systems do.
Frequently Asked Questions About Rope Control Device Systems
Is a rope control device system the same as a belay device?
No. The belay device is one component. The full system includes rope, carabiner, harness attachment point, and user behavior.
Can I use any rope with my GriGri?
No. Petzl certifies specific diameter ranges. Using out-of-spec ropes voids safety guarantees and increases slippage risk.
Do assisted-braking devices make me safer?
Yes—but only if used correctly. They reduce—but don’t eliminate—the need for active brake-hand discipline. Complacency kills.
How often should I replace my belay device?
Immediately if cracked, warped, or deeply grooved. Most manufacturers recommend 5 years of regular use as a max lifespan—even if it looks fine.
What’s the worst advice I keep hearing?
“Just hold the rope tighter.” Nope. Proper device selection, rope compatibility, and technique matter far more than grip strength. That’s the terrible tip I hear too often—and it’s dangerously incomplete.
Final Thoughts: Control Isn’t Optional—It’s Climbing’s Backbone
Your rope control device system is the silent partner on every pitch. Ignore it, and you roll dice with gravity. Respect it—with knowledge, practice, and the right gear—and it becomes your most reliable ally.
So next time you clip in, ask: “Is my entire system optimized—not just my device?” Because on rock, millimeters and milliseconds decide outcomes. And you? You deserve to walk away clean every single time.
Like a 2004 Motorola Razr, some classics endure—but they still need charged batteries and clean contacts. Your rope control system? Same rules apply.